Activate SAML SSO for a Company
This authentication method was implemented to avoid manually creating users within a company and to allow them to use the same credentials from SAML applications. For example, with Microsoft, you can configure it so that all users in your domain can log in to the Shippify dash. As users log in to the dash, they will be created in the system under specific roles.

Configure user roles in your identity provider
Through SAML SSO, you can assign user roles that provide certain permissions in the Shippify account, which also apply to all Shippify APIs. User roles are assigned in the identity provider and transferred to Shippify in the SAML assertion. The available user roles are:
Super Admin
super_admin
Manage all the account options and settings.
User
operator
Allow full task management and editing of profile settings.
Searcher
searcher
Only allowed to perform searches.
Many identity providers use custom attributes and attribute statements for roles. Typically, roles can be assigned to individuals or groups. Refer to your specific IdP documentation for more details.
Configuration
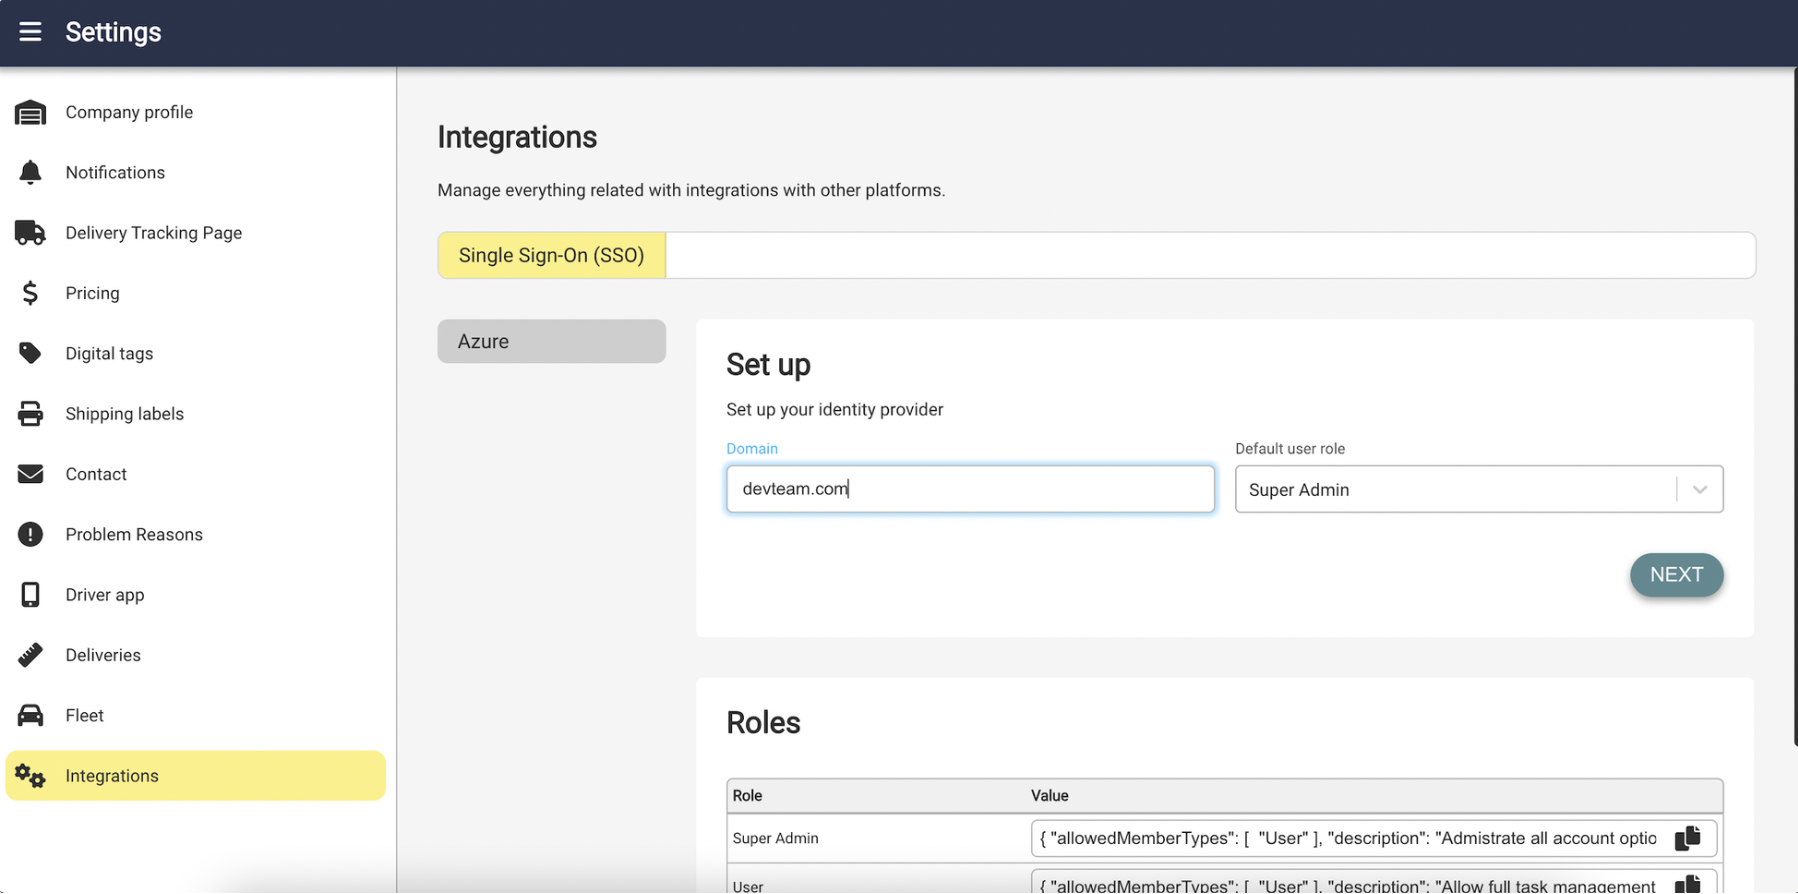
To complete the initial connection between the identity provider and shippify.co, enter the required information in the SSO configuration page of your Shippify account.
Domain: domain of the users' emails.
Default user role: Role that new users will take within Shippify.

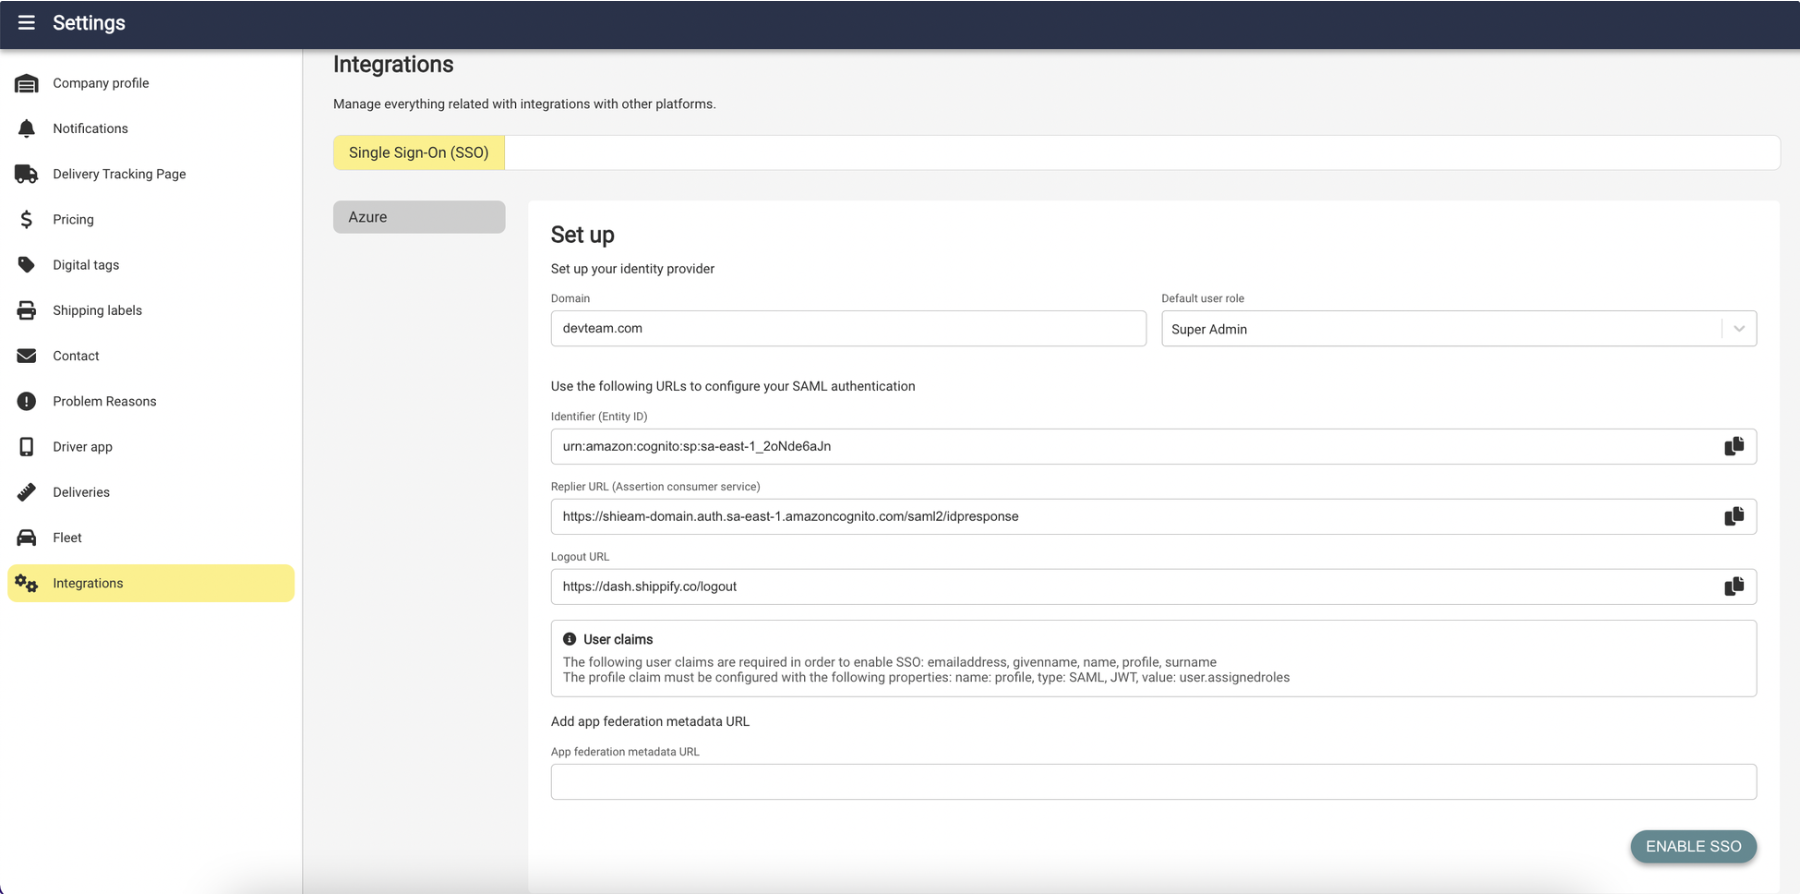
Click on Next to submit the form. You will be prompted to complete the SAML IdP details.

Identifierrefers to theEntity ID,Issuer,orIssuer URLin your IdP. Copy this value into your IdP.Reply URLrefers to theAssertion consumer service.Copy this value into your IdP.Identity Provider logout URLrefers to theSSO sign-out URLin your IdP. Copy this value into your IdP.App federation metadata URL.From your IdP's SSO configuration page, copy the metadata URL to the Shippify configuration page and click Enable SSO to complete the setup.
Última actualización