Steps to integrate
In this section, we will guide you step by step on how to integrate us into your Prestashop store.
 Creating an account in Shippify
 Creating an account in Shippify
If you already have an account, you can proceed to the next step.
Creating an account on our platform is free of charge. You can go to this link and fill in your company's information, and you're all set.
Once you've done that, you'll receive an email with more information (If not, please contact us through the chat on our website).
All Shippify accounts are created with Prepaid mode, meaning that to create your deliveries, you'll need to purchase credits in the Billing section (payment with a credit card or transfer). If you need commercial support, you can write to us through our website.

 Creating a warehouse
 Creating a warehouse
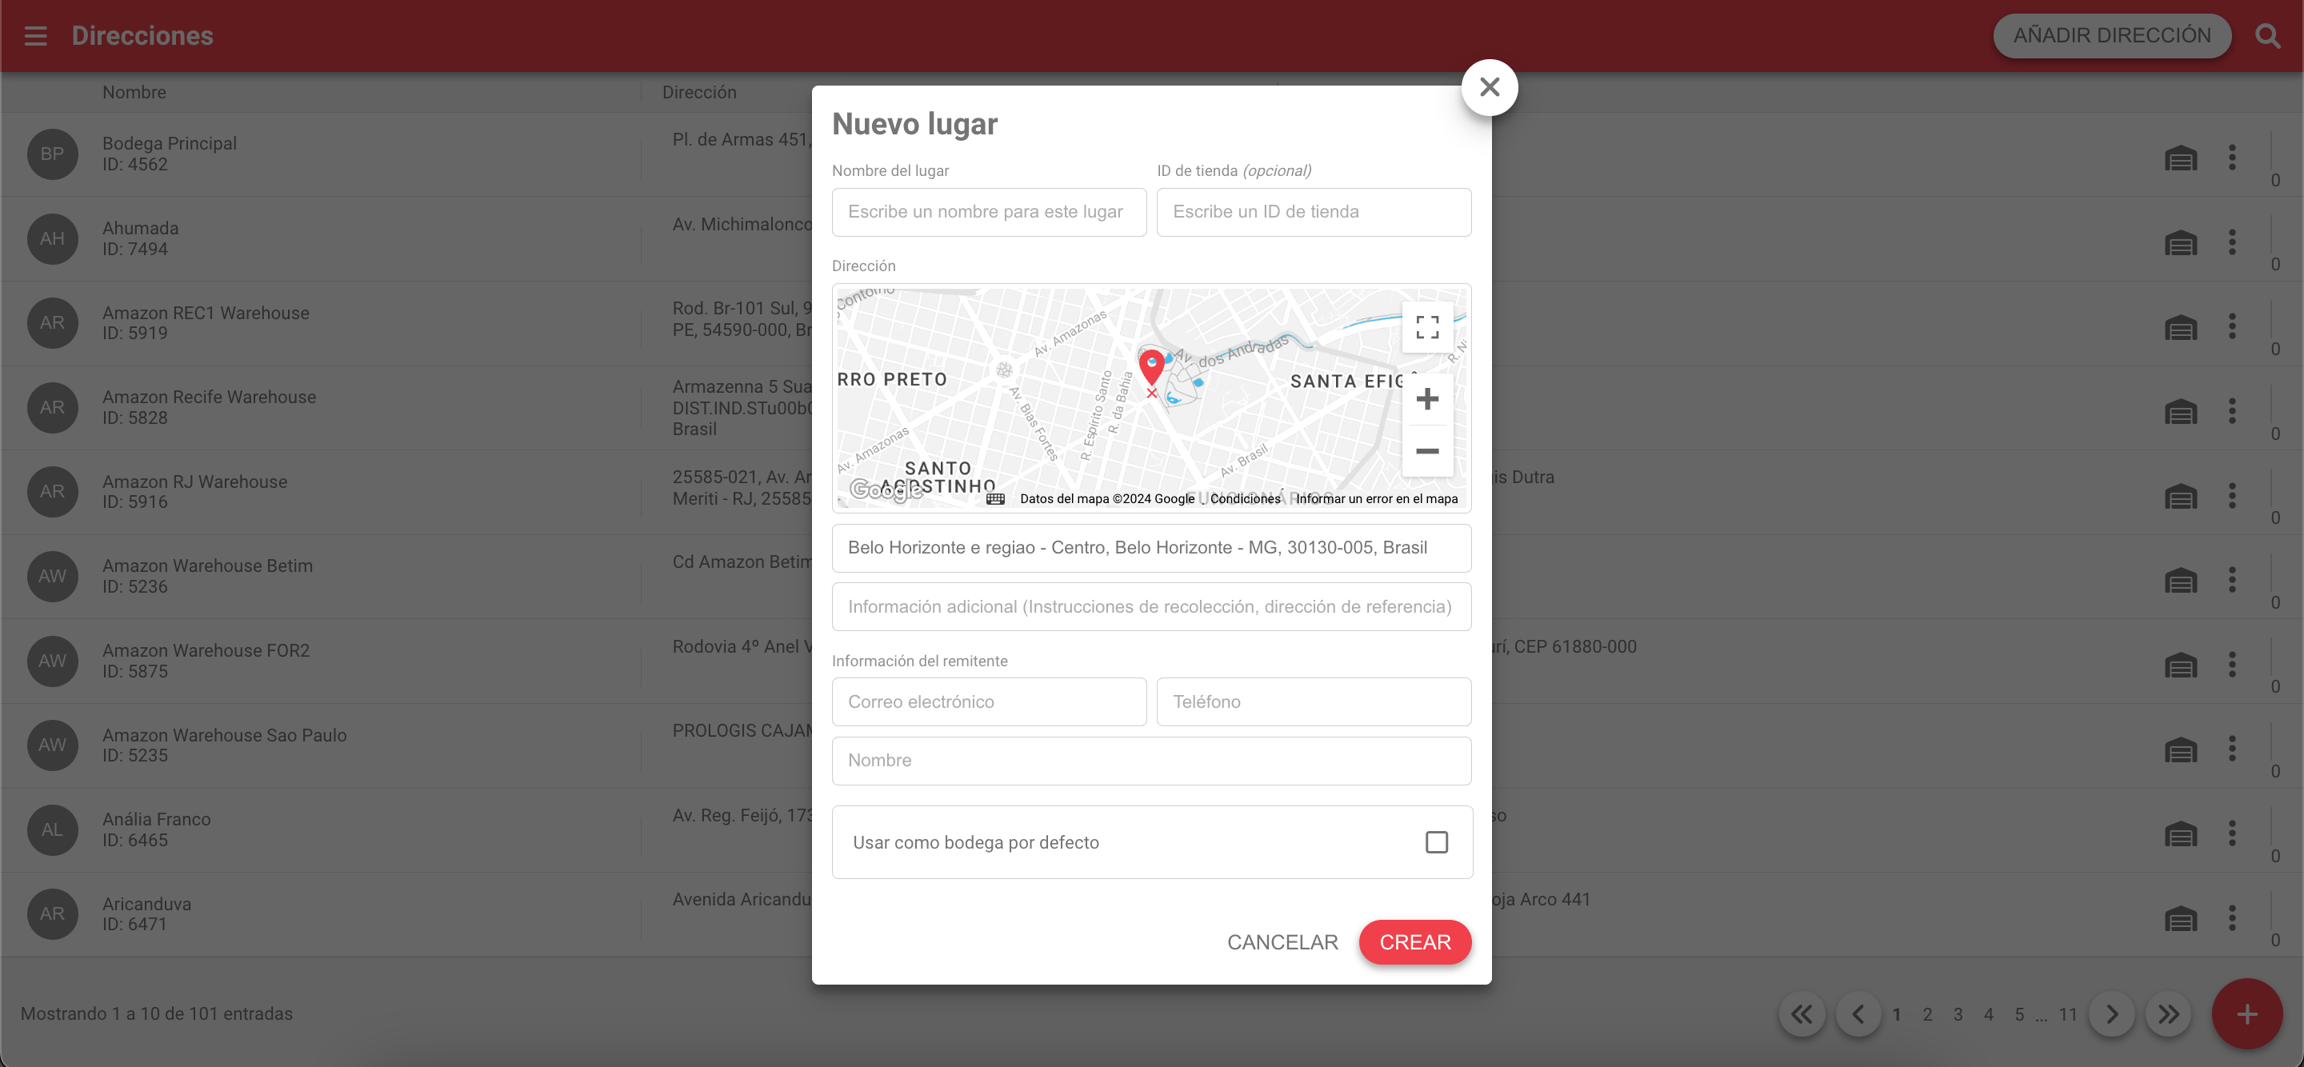
Deliveries created in the system will always have a warehouse as a collection point, which you must create by entering here link.
You must fill in all the requested information and save the identifier to use it in the next step.

 Installing
 Installing
Get the latest release here by downloading the shippify.zip file.
In your panel, go to the "Modules and Services" tab. In the upper right corner, click at the "Add new module" button.
Click to choose a file and upload the shippify.zip file you have downloaded.
Click on "Upload this module".
Type "Shippify" in the module list search box.
Click the "Install" button to install the module.

 Configuring
 Configuring
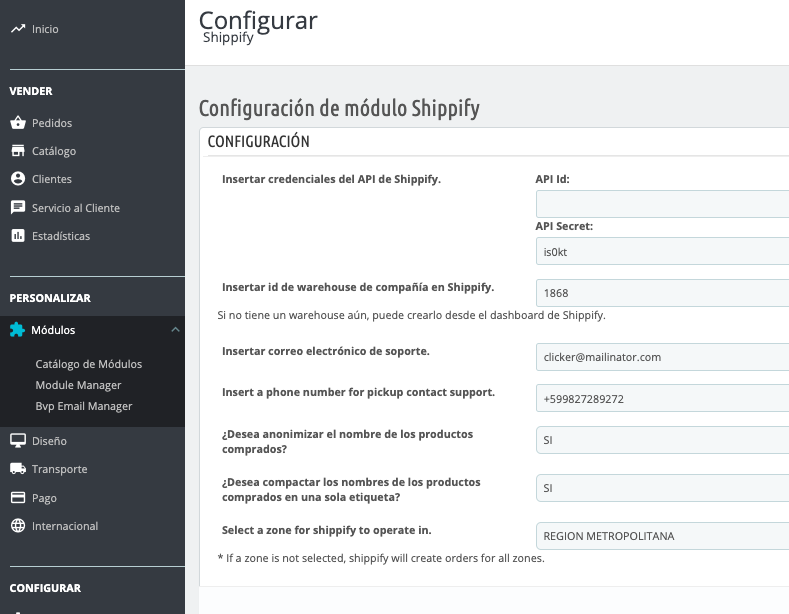
Upon completing the installation, go to configure the Shippify module in your panel and fill out the form that appears to link your Shippify and Prestashop accounts.

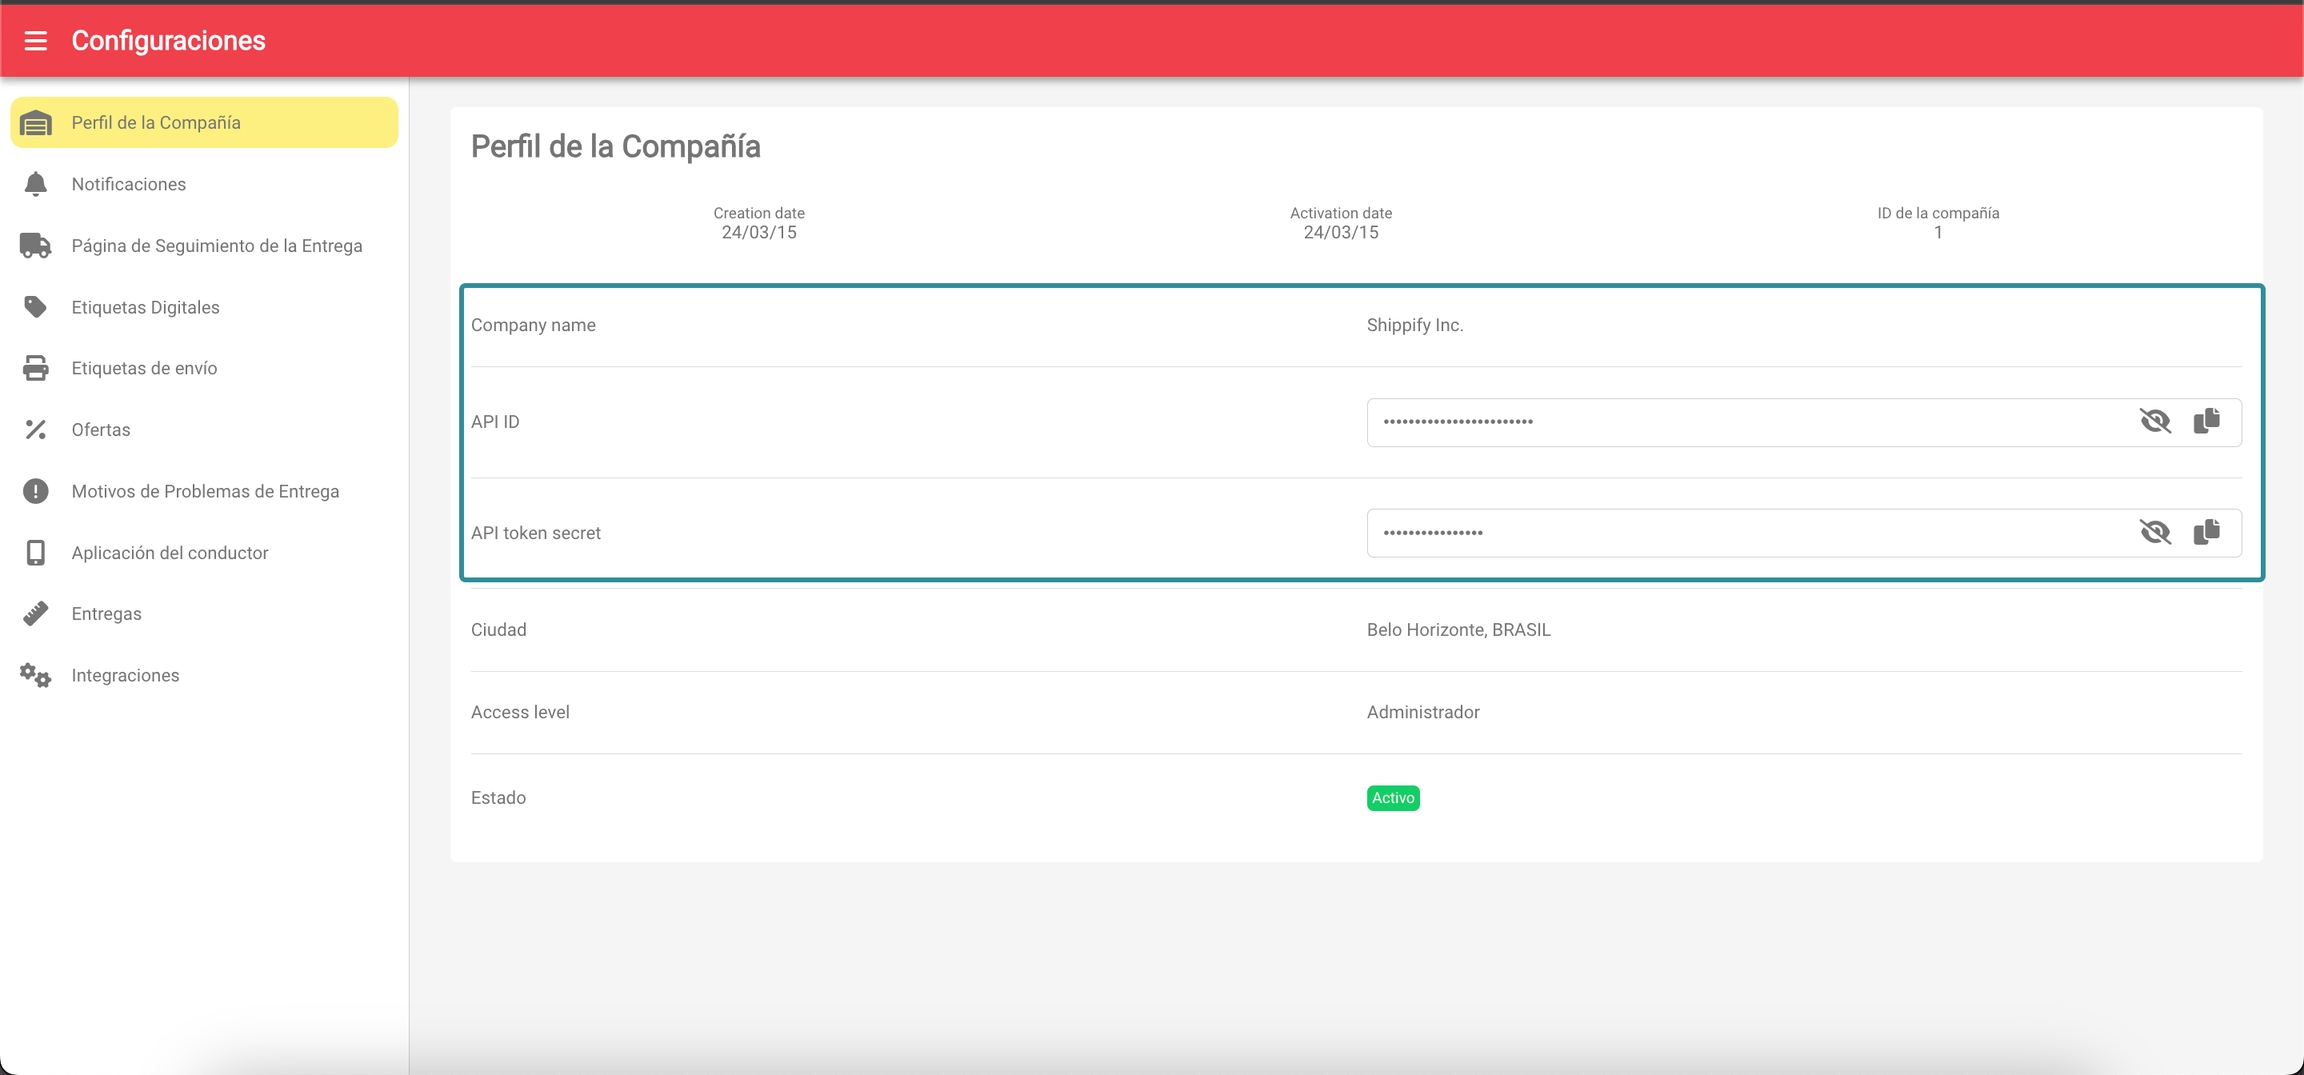
You will obtain the Shippify API credentials by accessing this link.

The warehouse is the identifier of the warehouse you created in step 2.
Additionally, it will ask for contact information in case support is needed, and finally, the area where you will operate with us.
It is important to configure the zone as deliveries created on the platform will depend on this. If you leave this field blank, all deliveries from all zones will be created in Shippify.
After saving this data, you will be able to observe in your Shippify account how deliveries are being created as your customers make purchases in your Prestashop store.
Última actualización